Ornithogalum Planting & Growing Guide
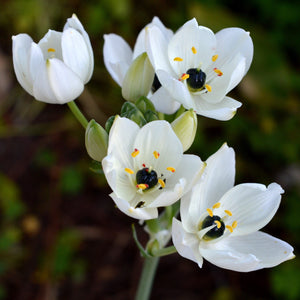
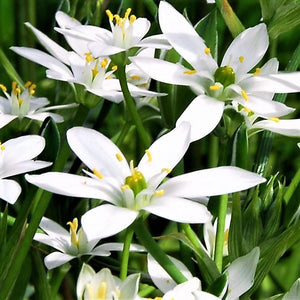
Ornithogalum, often referred to as Wonder Flowers or Star of Bethlehem, are gorgeous spring bloomers that are easy to please and even easier to love! Plus, with varieties suited to most growing zones, there's a perfect choice for every garden. Beyond being undeniably beautiful, the blossoms are perfect for cutting and make long-lasting additions to bouquets and other arrangements. So, have we sold you on Ornithogalum as a worthy addition to your display yet? Get all the dirt on planting and growing with this informative guide.
Success Snapshot
PLANTING
DEPTH
4"

WATER
QUANTITY
Moderate; Low in dormancy
SUNLIGHT
QUANTITY
Full to Partial Sun
PLANTING
PROXIMITY
6" Apart
BLOOM
SEASON
Spring
HARDINESS
ZONES
Species dependent; Zones 5-11
Shop Related Products
Where to Plant
Site your Ornithogalum where the soil drains well, and they will receive full-day sun. If you notice puddles of water 5–6 hours after a hard rain, scout out another site or amend the soil with organic material to raise the level 2–3 inches. These plants are great for containers or outdoor plantings but will rot in soggy soil or standing water.
When to Plant
Plant your Ornithogalum bulbs in the fall before the first frost for stunning spring blooms. You can expect the roots, and sometimes tiny sprouts, to form shortly after planting in the autumn months.
How to Plant
- For outdoor landscape planting, find a spot where the soil drains well, and your Ornithogalum plants will receive full-day sun. Dig holes and plant the bulbs 3" deep and 6" apart with the pointy ends facing up.
- For container planting, start with good quality, well-draining potting soil, and plant the bulbs 3" deep and 5" apart with the pointy ends facing up. Be sure to choose a container with adequate drainage holes.
- Water thoroughly after planting, soaking the soil to settle it around the bulbs.
How to Grow
- Water as needed during active growth periods, supplying about 1” of moisture per week.
- Leave the foliage in place after blooming has finished for the season. The leaves will gather sunlight to create food through photosynthesis, strengthening the bulb for the future.
- Remove the dry foliage when the leaves turn yellow and die back around late summer.
- Allow your Ornithogalum plants to rest for a few months in dormancy before beginning the next growing cycle.
Ornithogalum Tips & Tricks
- Feel free to snip a few flowers when in bloom for long-lasting arrangements, as doing so will not hurt your plants.
- Amend the soil with ground bark, decomposed manure, or compost to improve drainage and encourage a healthy start.


