Snowdrops (Galanthus) Planting & Growing Guide
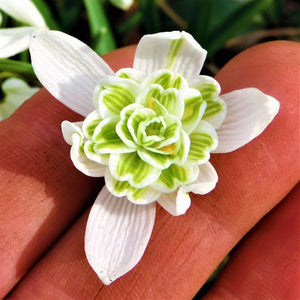
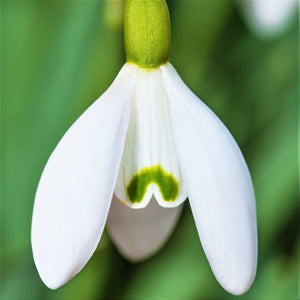
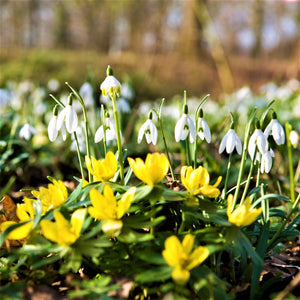
If you live in an area where the winter seems to linger forever or if you just prefer to have flowers blooming as close to year round as possible, snowdrops are an easy solution. These tough-as-nails little plants sprout even through snow - hence their name - and blossom while the calendar (and often the weatherman) say it's still winter. With buds like tiny alabaster pearls, one each dangling from a slightly arching stem, snow drops are fine additions to woodland gardens, planted with crocuses and tucked around the bases of deciduous trees and shrubs. These tiny gems are also deer resistant, so they're ideal for planting in areas that back to "forever wild" plots. Snowdrops take a year to become established so don't be disappointed if they only flower lightly the first spring. They'll produce more blooms and begin to develop into thick patches by year two. Also, these bulbs tend to dry out if they are left out of the ground at ambient air temperatures for long, so please plant immediately. In future seasons, there will be no need to divide and separate your snowdrop bulbs, so other than these initial considerations, snowdrops are among the easiest plants to grow. (For early season blooms in the warmest of regions, snowflakes, or Leucojum, are recommended as more perennial choices.)
Success Snapshot
PLANTING
DEPTH
2-3"

WATER
QUANTITY
Moderate
SUNLIGHT
QUANTITY
Partial Sun to Partial Shade
PLANTING
PROXIMITY
2-3" Apart
BLOOM
SEASON
Late Winter to Early Spring
HARDINESS
ZONES
Zones 3-8
Shop Related Products
- Find a location where the soil drains well. If there are still puddles of water 5-6 hours after a hard rain, scout out another site. Or amend the soil with the addition of organic material to raise the level 2-3 inches to improve the drainage. Peat moss, compost, ground bark or decomposed manure all work well and are widely available.
- Plant your snowdrops in light to moderate shade. (Elwesii prefers full sun to light shade.)
- Dig holes and plant the bulbs about 3" apart and with their pointed tops 2-3” below the soil surface. Position the bulbs with the pointy end facing up.
- After planting, water well to settle the soil around the bulbs. Most bulbs will begin to grow roots in just a week or two but you won't see activity above the soil until late winter or early spring.
- When the season's blooms are past, your snowdrops need to store energy for next year's show. Allow the leaves to photosynthesize (process sunlight to produce food) until they yellow and wither, before removing the spent foliage. Trimming still-green foliage will reduce plants' ability to nourish next year's flowers, resulting in fewer, smaller flowers.
- Water during the autumn and winter with a water-soluble fertilizer to nourish the bulbs as they develop new roots and top growth. Your bulbs will survive without fertilizer, but providing extra nutrients encourages more flowers, larger blossoms and longer life for your bulbs.
Pots, Barrels, Tubs & Urns
- Fill your containers with good quality, well-drained soil. Almost any commercially available potting medium will work fine. Make sure there are adequate drainage holes; galanthus bulbs must never sit in water logged soil or they will rot.
- Plant your snowdrops in light to moderate shade. (Elwesii prefers full sun to light shade.)
- Plant your snowdrops close to each other, with hips about an inch apart, for the most brilliant display. Tuck them down 2-3” inches into the soil. Position the bulbs with the pointy end facing up. Feel free to plant early blooming snow crocuses, a perfect companion for snowdrops, in the same container.
- After planting, water well to settle the soil around the bulbs. Most bulbs will begin to grow roots in just a week or two but you won't see activity above the soil until late winter or early spring.
- When the season's blooms are past, your snowdrops need to store energy for next year's show. Allow the leaves to photosynthesize (process sunlight to produce food) until they yellow and wither, before removing the spent foliage. Trimming still-green foliage will reduce plants' ability to nourish next year's flowers, resulting in fewer, smaller flowers.
- Water during the autumn and winter with a water-soluble fertilizer to nourish the bulbs as they develop new roots and top growth. Your bulbs will survive without fertilizer, but providing extra nutrients encourages more flowers, larger blossoms and longer life for your bulbs.


